Tuesday, December 30, 2008

TWD: Tall and Creamy Cheesecake


When I saw that the last recipe for December was a cheesecake recipe I was both excited and nervous. I've never made a cheesecake before, even though it is something that I've always wanted to try. So I was very happy to see this recipe, because I knew it would be the kick I needed to finally make this awesome treat.

I was so inspired by this recipe and how great it sounded that we decided to make one for each of our parents for Christmas, since my dad and Doug's mom are cheesecake fans. This was so good that all of our parents absolutely raved about it. This has a nice creamy texture and a light sweet taste to it. And it's really actually very easy to make (trust me, I've made it three times now counting the one I just made for us to keep). The most time consuming aspect of this is the baking and cooling periods. This recipe also freezes really well, when we made the cakes for our parents we kept them in the freezer for a couple of days to make sure they stayed fresh and they were perfect.


I think this is a great recipe for someone who is new to cheesecakes, it's simple to follow and tastes great. I will definitely be trying more cheesecakes in different flavors in the future, so stay tuned!

This recipe was picked by Anne of AnneStrawberry, check out this great blog.

This recipe is from Baking From My Home to Yours by Dorie Greenspan, pages 235-237.

Monday, December 29, 2008

One Year Ago Today...

One year ago today we got married! Doug loves me enough that he was willing to get married in the winter (which he hates) for me. I really like winter and the holiday season and thought it would be the perfect time for a wedding... and I think I was right. We had an amazing wedding with family and friends. It was a beautiful candle light ceremony followed by a lovely reception, it was a great night for everyone. So, since this is my blog and I want to celebrate, here are a few pictures (including our awesome looking cakes!).


Saturday, December 27, 2008

I Fell in to a Melting Ring of Tacos


I love looking at blogs to get ideas for new, interesting dinner items to break up our usual routines. So I get really happy when I discover that one of my cooking friends has a blog going. So I was doubly happy when I saw that my friend Maci had a food blog and that it was full of incredibly yummy looking dishes. This is my first attempt at making something off her blog, but I'm sure it won't be my last.

This taco ring was so easy to make but tasted so good. I used ground turkey, which I'm still pretty new to and I like having easy places to use it (but you could totally use ground beef instead). The one issue I had with this had absolutely nothing to do with the recipe: the stupid crescent rolls didn't want to roll out right, needless to say I will be sticking to Pillsbury from now on, saving a few cents was so not worth the headache the rolls gave me.

This is an incredibly easy and tasty meal that I totally recommend for a quick, weeknight meal. It will definitely be making more appearances in our dinner rotation. And check out Maci's blog, it's great!


Taco Ring

Ingredients:
2 packages refrigerated, ready to bake crescent rolls (8 rolls each)
1 pound ground turkey
1 pack taco seasoning
lettuce, sour cream, salsa and cheese for topping

Directions:
Preheat oven to 350°F.
To make the filling: in a skillet, brown turkey and add taco seasoning. Follow directions on seasoning packet, using slightly less water than called for.
To make the crust: open one pack of crescent rolls and separate. Lay the crescent rolls in a circle around the pan, narrow side pointing out. You want to do this so that the angled side of the crescent roll is going the same direction around the pan (i.e. if your first roll has the angled side on the right, then continue laying the rolls so that the angled side is on the right each time). When you are finished, it will look like a sun.
Open the second pack of crescent rolls and separate. Lay one crescent roll, still with the narrow end pointing out, in between two of the previous crescent rolls. Line up the bottom of this roll with the bottom of the first layer of rolls (it will be on top of the first layer). You just want to make sure that the pointy end of this one is in the middle of two pointy ends of the previous ones. Continue until all the rolls are laid out.
Using a spoon, carefully add the meat to the wide part of the crescent rolls.
Once the meat has been added, fold the narrow end of the crescent rolls over the meat.
At this point, you can tear the narrow ends and tuck the top of the crescent roll into the bottom of the roll. Using the extra ends you've torn off, cover any open spots you may have between rolls.
Bake until the crescent rolls are a light golden brown.
Lightly sprinkle with cheese (just a small amount) and return to oven until cheese is melted and toasty.
Serve with all your favorite taco toppings.

Red Velvet Cookies


I love red velvet cake, so much so that it was my flavor choice for our wedding (Doug's was German Chocolate). I have never been brave enough to make one from scratch (I should add that to my list of Things I Want To Do In The Kitchen In 2009) but I usually have a mix in the cabinet. So when I volunteered to bring dessert to Doug's family's Christmas gathering and started thinking about what was in the cabinet I zoomed in on this cake mix. But I didn't want to just make a cake or even cupcakes, I've been making cookies all week and that's where my mind currently is. That's when I remembered the Funfetti Cookies I'd had once before. These cookies are incredibly easy, just cake mix, egg, and oil. So, after checking with my baking friends to make sure it was possible, I decided to make the Funfetti Cookies into Red Velvet Cookies.

I opted to not ice these because I think red velvet is pretty sweet on its own, but I did dust half of them with powdered sugar, which I think provided a nice extra kick of sweetness, but the ones I didn't dust were just as good. These seemed to be pretty popular and quite a few of them disappeared off the platter, and I have no problem eating the ones that are left. I will definitely be making these again.


Red Velvet Cookies
Based off the Funfetti Cookies recipe

1 (18.9-oz.) Package Red Velvet Cake Mix
1/3 Cup oil
2 Eggs

Heat oven to 375°F. In large bowl, combine cake mix, oil and eggs; stir with spoon until thoroughly moistened. Shape dough into 1-inch balls; place 2 inches apart on ungreased cookie sheets. With bottom of glass dipped in flour, flatten to 1/4-inch thickness.

Bake at 375°F. for 6 to 8 minutes or until edges are light golden brown. Cool 1 minute; remove from cookie sheets.

Frost or sprinkle with powdered sugar. Store in tightly covered container.


Holiday Sweets Exchange: Peanut Butter Cup Cookies

The cooking board that I frequent (not sure that's a strong enough word!) had a holiday sweets recipe exchange spearheaded by one of the great members. I was really excited to do this again since I had a lot of fun making the divinity recipe I received last year. I was really, really happy with the recipe that I got this year. I love Reese's Peanut Butter Cups and peanut butter cookies, so this was a a perfect recipe for me!
I've actually already made these twice because we loved them so much. I made these this past Sunday night as a special treat for Doug and I amid all the holiday baking I was doing (since that was all for gifts and we couldn't eat it) and we loved them. Then I made another batch last night to take to Doug's parent's house today for our holiday celebration with Doug's grandma and family from Alabama. These were a total success! They were gone before we had even eaten dinner. Everyone who has tried these has absolutely loved them and I love them even more because they are so easy to make. This recipe calls for a peanut butter cookie mix, which I used because I was busy enough with holiday baking, but if you have a favorite peanut butter cookie recipe I see no reason why you couldn't use that. The one thing I didn't do to these was put the mini m&m's on top, because I kept forgetting to buy them, but I think they are perfect with out them, both in taste and appearance.

These are a great cookie and I'm really excited to have this recipe in my arsenal now, Doug says that they are his current favorite, so I will definitely be making these again.


Peanut Butter Cup Cookies
Source: WC Holiday Sweets Exchange

1 package peanut butter cookie mix
1 bag reese’s peanut butter cups
Mini m&ms

Line a mini muffin pan with mini muffin wrappers.
Prepare dough according to the cookie mix.
Roll cookie dough into small balls and place in each individual wrapper.
Bake as directed on package.
Remove from oven and place 1 peanut butter cup in each cookie.
As chocolate melts on top add the mini m&ms.
Let cool in the pan.
I use a toothpick to help pull each cookie out.
Put a couple in the freezer to try them cold.

Friday, December 26, 2008

The Meal That Made Me a Keeper


Well, maybe not really, but I'm pretty sure it helped. I made these incredible enchiladas for the first time more than two years ago and they are still one of our favorite meals. I love them because, though I've been trying to work on improving my eating habits, these don't have anything in them that I have ever avoided. Doug loves them because they are a delicious Mexican food item. We both love Mexican food but do not go out for it very often anymore, for one because it can get expensive and, two, because I can make these at home.

I found this original recipe on allrecipes.com and have tweaked it slightly to make it exactly what we like. I love this recipe because it is easy and fast to throw together, relatively inexpensive, and makes incredible leftovers the next day (we usually double this to ensure a few days' worth of leftovers.) So try these, I don't think you'll be disappointed.


Chicken Enchiladas
Adapted from allrecipes.com

4 cooked skinless, boneless chicken breast halves
1 cup sour cream
2 cups shredded Cheddar cheese You can also use the Mexican cheese mix
1-2 Tablespoons Taco or Fajita Seasoning
1 (12 ounce) package flour tortillas
1 (8 ounce) jar salsa for eating

Preheat oven to 350 degrees F (175 degrees C).
Shred the cooked (and seasoned) chicken breast meat, and place in a large bowl. Mix in sour cream and shredded shredded cheese (retain about a 1/2 cup for topping). Place a heaping spoonful of the mixture in each tortilla, roll up, and place rolled tortillas seam-side down in a 9x13 inch baking dish. Bake for 10 minutes, remove and add remaining cheese on top.
Bake for another 8-10 minutes, or until heated through and cheese is melted.

Tuesday, December 16, 2008

TWD: Buttery Jam Cookies


I was a little curious when I saw this recipe. I had expected these to be like a thumbprint cookie, a buttery cookie with jam in the middle. Instead these have the jam mixed into the cookies. I decided to try strawberry preserves in this and it was really good. This is a nice, light cookie. Not necessarily one that screams Christmas time, but definitely good.
Heather of Randomosity and the Girl picked this recipe, check out this great blog. And don't forget to check out the TWD blog roll to see how everyone made these.
Buttery Jam Cookies from Baking From My Home to Yours by Dorie Greenspan, page 80.

Sunday, December 14, 2008

Banana Bread


I love bananas in any form: bread, cake, muffins, peanut butter and banana sandwiches, and even just as a plain ole piece of fruit. So when my grandma had some extra bananas that were about to be too ripe to eat and she said I could have them I knew exactly what I was going to make. This has been my go-to recipe for banana bread for a couple of years now. It's actually a recipe for muffins but turns into a really nice loaf of bread. It gets a great color to it and is nice and dense with a great flavor.


The reason why I haven't blogged this before is that I don't have the original source for it. I printed it off probably two years ago, long before I started blogging or even really knew about food blogging. Therefore I didn't bother to write down where I got the recipe, I'm pretty sure that it never dawned on me that I would need to know where this came from. But this recipe is so great that I finally decided that I need (yes need) to share it with you all. There are requests for banana bread fairly frequently on the cooking board I frequent and I finally decided that I wanted to have this recipe where I could easily direct people to it. So, if this is your recipe, or you think you know where it came from, please let me know so I can give you credit. Enjoy! Edit: we have a source! One of the great girls on the cooking board found this recipe for me on the blog dinner a deux. Thanks!


Banana Muffins/Bread
From this blog
Recipe Adapted from a Giada De Laurentiis recipe

Makes 10-12 muffins or 1 Loaf

1.5 cups all-purpose flour

1/2 teaspoon baking soda

1/2 teaspoon salt

1/4 teaspoon baking powder

1/2 teaspoon ground cinnamon

1/2 teaspoon ground nutmeg

1 cup sugar

1/2 cup vegetable oil

2 eggs

1/2 tablespoon vanilla extract

2 ripe bananas, peeled and coarsely mashed

Whisk the flour, baking soda, salt, baking powder, cinnamon, and nutmeg in a medium bowl to blend. Beat the sugar, oil, eggs, and vanilla in a large bowl to blend. Stir in the banana. Add the dry ingredients and stir just until blended.* Divide the batter among the prepared muffin cups. Bake the muffins on the middle rack until the tops are golden brown and a tester inserted into the center comes out with no crumbs attached, about 25 minutes. Transfer the muffins to a rack and cool slightly, but eat warm. *I pour the batter into a greased loaf pan and bake for 30-40 minutes or until a toothpick comes out clean.

Tuesday, December 9, 2008

TWD: Sugar Cookies


Ok, I'll admit it: I was really excited when I saw that sugar cookies were one of the recipes for this month. I love sugar cookies but don't make them often because Doug isn't a big fan and I hate to make something just for me. I've also been on the hunt for a great sugar cookie since I moved out of my parents house and thus away from my mom's cookbooks.

This recipe is really good, but I'll probably keep up the search. I ended up just making these as a drop cookie because I didn't have the time or patience to roll them out. These had a nice taste and texture and are really very yummy. I will definitely keep this recipe around to grab when I want something quick and easy, which this one definitely is.

This week's recipe was picked by Ulrike at Kuchenlatein. Check it out!

Grandma's All-Occasion Sugar Cookies from Baking From My Home to Yours by Dorie Greenspan, pages 146-147.


Saturday, December 6, 2008

The Sweet 100

When I saw this on Joelen's blog I realized I don't have as big of a sweet tooth as I thought!

How the Sweet 100 Works:
1) Copy this list into your blog or journal, including these instructions.
2) Bold all the items you’ve eaten.
3) Cross out any items that you would never consider eating.

1. Red Velvet Cake
2. Princess Torte
3. Whoopie Pie
4. Apple Pie either topped or baked with sharp cheddar
5. Beignet
6. Baklava
7. Black and White Cookie
8. Seven Layer Bar (also known as the Magic Bar or Hello Dolly bars)
9. Fried Fruit pie (sometimes called hand pies)
10. Kringle
11. Just-fried (still hot) doughnut
12. Scone with clotted cream
13. Betty, Grunt, Slump, Buckle or Pandowdy
14. Halvah
15. Macarons
16. Banana Pudding with nilla wafers
17. Bubble tea (with tapioca “pearls”)
18. Dixie Cup
19. Rice Krispie treats
20. Alfajores
21. Blondies
22. Croquembouche
23. Girl Scout cookies
24. Moon cake
25. Candy Apple
26. Baked Alaska
27. Brooklyn Egg Cream
28. Nanaimo bar
29. Baba au rhum
30. King Cake
31. Sachertorte
32. Pavolva
33. Tres Leches Cake
34. Trifle
35. Shoofly Pie
36. Key Lime Pie (made with real key lime)
37. Panna Cotta
38. New York Cheesecake
39. Napoleon/mille-fueille
40. Russian Tea Cake/Mexican Wedding Cake
41. Anzac Biscuits
42. Pizzelle
43. Kolache
44. Buckeyes
45. Malasadas
46. Moon Pie
47. Dutch Baby
48. Boston Cream Pie
49. Homemade chocolate chip cookies
50. Pralines
51. Gooey butter cake
52. Rusks
53. Daifuku
54. Green tea cake or cookies
55. Cupcakes from a cupcake shop
56. Creme Brulee
57. Some sort of deep fried fair food (twinkie, candy bar, cupcake)
58. Yellow cake with chocolate frosting
59. Jelly Roll
60. Pop Tarts
61. Charlotte Russe
62. An “upside down” dessert (Pineapple upside down cake or Tarte Tatin)
63. Hummingbird Cake
64. Jell-O from a mold
65. Black forest cake
66. Mock Apple Pie (Ritz Cracker Pie)
67. Kulfi
68. Linzer torte
69. Churro
70. Stollen
71. Angel Food Cake
72. Mincemeat pie
73. Concha
74. Opera Cake
75. Sfogliatelle / Lobster tail
76. Pain au chocolat
77. A piece of Gingerbread House
78. Cassata
79. Cannoli
80. Rainbow cookies
81. Religieuse
82. Petits fours
83. Chocolate Souffle
84. Bienenstich (Bee Sting Cake)
85. Rugelach
86. Hamenstashen
87. Homemade marshmallows
88. Rigo Janci
89. Pie or cake made with candy bar flavors (Snickers pie, Reeses pie, etc)
90. Divinity
91. Coke or Cola cake
92. Gateau Basque
93. S’mores
94. Figgy Pudding
95. Bananas foster or other flaming dessert
96. Joe Froggers
97. Sables
98. Millionaire’s Shortbread
99. Animal crackers
100. Basbousa

I've only had 24 of these. I must work on this!

Sunday, November 30, 2008

A Nerve Wracking Addition to Thanksgiving

Have you ever tried to make something that you've never tried or even seen before? I hate cook books that don't have pictures because I like to see what items look like so I know if mine look right. Anyone else? Now, have you ever made something that you've never tried or seen before, but that a large portion of your perspective diners not only remember but remember as a major part of their childhood? Yeah, pretty nerve wracking.
This was what I faced preparing for Thanksgiving. For some idiotic reason, that I have since forgotten, I volunteered to make the cranberry sauce for our Thanksgiving celebration using my great grandmother's recipe. My mom, aunt, and grandmother all very clearly remember this recipe, they remember not only eating it but also helping to prepare it. Needless to say I was a little stressed out. And when Doug turned to me half way through the making of the sauce, when our poor tiny Cuisinart food processor was whining in complaint and the counters were covered in fruit, and asked "does this look right?" it dawned on me that I should stop volunteering to make things........ ok, not really. But it did dawn on me that I really did not want to mess this up. Luckily it was deemed acceptable, if not quite sweet enough, and people actually did eat it, although we have a decent amount left.

This actually wasn't too hard to make, and it would be a lot easier with a larger food processor, and is really good. Although it didn't end up being the only cranberry sauce on the table, you can't take away the canned stuff without warning, I think it was a hit. And I will definitely be trying some more of my great grandmother's recipes, hopefully in slightly less stressful situations.


Grandma's Cranberry Sauce
I don't know the original source on this, it's a very old family recipe

2 Apples
2 Oranges
1 Bag of Cranberries
Sugar to taste
Grind fruit (can use a food processor); mix in bowl and add sugar to taste.

Variations: To make Jell-o salad add above ingredients to one prepared box of cranberry Jell-o and allow to chill for at least 1 hour. I didn't do this but my mom says it is good.

Bringing the Cranberries to Thanksgiving


When my family has Thanksgiving you can be sure that there will be at least one pumpkin treat, if not more, and in recent years I've made sure that pecans are represented as well. So this year, when others beat me to the pumpkin and pecan items, I was at a loss for what to make. I kept finding great looking recipes, but they all featured one of the two items that were already going to be accounted for when our families gathered for our first joint family Thanksgiving at my parents' house. Then I had a flash of genius: cranberries! I was already going to be buying some for the cranberry sauce, so why not just grab an extra bag. Then I quickly remembered this awesome cranberry walnut bread recipe that I saw on Katie's blog and my dessert was born.

I think this bread was a nice alternative to the pies that were brought along to the party (and my goodness were there a lot of pies!). It was a bit of a lighter bite, with a nice fresh taste, courtesy of the orange zest and juice and cranberries. The walnuts were also a nice addition, even though I am not crazy about them. This would be a great item to bring in to a work party or a Christmas event as a nice alternative to the traditional dessert items of the season. And it's also a great item because it can be made a day or two ahead of when you need it and will be perfect, I made this Wednesday evening and it was perfect.


Cranberry Walnut Bread


Ingredients:
2 c. all purpose flour
1/2 c. granulated sugar
1 Tbsp baking powder
1/2 tsp salt
2 tsp grated orange zest
2/3 c. juice from an orange
2 eggs, lightly beaten
3 Tbsp unsalted butter, melted
1/2 c. shelled walnuts, coarsely chopped
1 1/4 c. fresh cranberries

Directions:
Preheat oven to 350 degrees and prepare a standard loaf pan.
In a small mixing bowl, combine orange juice, eggs, butter, and stir to combine thoroughly; set aside.
In large mixing bowl, sift together flour, sugar, baking powder, and salt.
Add orange zest and stir to combine.
Add wet ingredients to well in dry ingredients and mix until just combined (don't over mix).
Fold in walnuts and cranberries and transfer mixture to prepared loaf pan.
Place into oven and bake until knife inserted into center comes out clean, about 50-55 minutes.
Remove bread from oven and cool in pan for 15 minutes.
Remove from pan and cool completely on wire rack.
Wrap and put away for 1 to 2 days before serving.

Tuesday, November 25, 2008

Happy Birthday Blog!!

So today is my one year blog anniversary! I can't believe I've been doing this for a whole year. I felt rather silly at first but now I'm so proud of this blog and really love working on it. I've really been trying to make interesting things lately so that I have stuff to blog about, which has really helped the variety in my kitchen.

I've made some great friends because of this blog, through things like the recipe exchange, blog events, and TWD. I'm really loving sharing great recipes and ideas with people and am very excited to continue. This is also my 50th blog post and I'm really looking forward to the next 50!

On that note, let me know what you think. Any ideas for blog events I should join? Anything you'd like to see? What types of recipes do you like?

And finally, thank you so much for reading this. I'm seriously amazed any time someone says they've read my mind, and even more so if they've made something from it and liked it. So thank you! I do this for you and you are such a great source of encouragement. So here's to many more tasty and interesting blog posts. Cheers!

TWD: Twofer Pie


So after taking last week off from TWD because it was my birthday and we had an abundance of cake I was really excited to try this pie. Basically it is a pumpkin pie with a pecan pie on top, which makes me a very happy girl. I didn't start liking pecan pie until 2 years ago when I made one for Doug and his family and discovered that I actually like it. This pie doesn't disappoint, it has a nice, creamy pumpkin layer with a crunchy, sweet pecan layer on top, so it's the best of both pie worlds. Doug has already asked me to make it again, which is a great sign.

I had to bake this longer than what the recipe called for, almost 20 more minutes actually, before the center was done. Other than that this is an incredibly easy recipe. Doug and I decided that we prefer this cold, which is how we like regular pumpkin pie. This would be great with whipped cream or even vanilla ice cream.

This recipe was picked by Vibi of La Casserole carree. Check out her blog.

Thanksgiving Twofer Pie from Baking From My Home to Yours by Dorie Greenspan, page 321.

Sunday, November 16, 2008

The Maple-flavored Breakfast


This blog is seriously lacking in breakfast items (other than muffins), I'm the first to admit this. The reason? We usually don't eat breakfast 1. at home, 2. together, or 3. sometimes at all. Monday through Friday I eat breakfast in the car on my way to work or incredibly quickly once I get to work and Saturday and Sunday usually find me eating oatmeal, another muffin, something that isn't really a breakfast food, or nothing at all. Most days of the week Doug doesn't eat breakfast, or if he does it is a poptart, something I've baked, or something that isn't really a breakfast food ( a dietitian would have a field day with us). Sometimes, if I'm feeling particularly energetic, I'll make a quick breakfast on a weekend if Doug doesn't have to go in too early, but that is pretty rare anymore. So when Doug told me that he had taken the first weekend in November off I knew I had to do something special. So when this recipe showed up in my email a few days later I knew it was meant to be.

I had never actually made a breakfast casserole before. I had tried many of them at other places, but had just never been brave enough to try one myself. This was incredibly easy, it is definitely a great starter recipe for those entering the world of breakfast casseroles. I followed this recipe exactly, using maple flavored sausage to bump up the flavor. I was a little worried actually about maple flavor (especially the syrup) with eggs (I really hate those McGriddle things at McDonald's- ick!) but this is actually really great. It took a little longer to cook than I thought it would but it ended up turning out perfectly. We had some leftover and Doug said it warmed up really well. Enjoy!


Maple Sausage Breakfast Casserole
Adapted from The Cook's Country Cookbook

- makes 6 servings -

Ingredients
6-8 frozen waffles (1/2-inch thick, not Belgian-style)
12 ounces maple breakfast sausage, crumbled
1 1/2 cups shredded cheddar cheese
6 large eggs
1 1/4 cups whole or low-fat milk
1/4 cup maple syrup
1/4 teaspoon salt
1/8 teaspoon pepper

Procedure
1. Adjust an oven rack to the middle position and heat the oven to 375ÂşF. Arrange the waffles in a single layer on a baking sheet. Bake until crisp, about 10 minutes per side.
2. Brown the sausage in a nonstick skillet over medium heat, breaking it apart with a spoon, 8 to 10 minutes. Drain on a paper towel-lined plate.
3. Butter an 8-inch square baking dish. Add half of the waffles in a single layer. Add half of the sausage and 1/2 cup of the cheese. Repeat layering the waffles, sausage, and 1/2 cup more cheese. Whisk the eggs, milk, maple syrup, salt, and pepper in a medium bowl until combined. Pour the egg mixture evenly over the casserole. Cover the dish with plastic wrap and place weights on top. Refrigerate the casserole for at least 1 hour or overnight.
4. Adjust an oven rack to the middle position and heat the oven to 325ÂşF. Let the casserole stand at room temperature for 20 minutes. Uncover the casserole and sprinkle the remaining 1/2 cup the cheese over the top. Bake until the edges and center are puffed, 45 to 50 minutes. Cool for 5 minutes. Cut into pieces and serve.


Another Birthday Cake


So I am slowly starting to get into making birthday cakes, very, very slowly. I'm not very good yet, so I've only made them for family members so far (because they have to say they like the cake no matter how bad it is, right?). This cake was actually really easy to make. I used a recipe for vanilla cupcakes from Annie's Eats, doubled it, and then used frosting from a can (hey, it was for young kids and they like what they like, right?). This cake is really light and has a good flavor to it, so I will definitely be making it again. The decorations are just gel icing, green sanding sugar, and conversation hearts turned over (don't worry, they were still fresh). The birthday girls love the cake, which made me very happy. I've also made cupcakes with this recipe and they were really good too, so give it try sometime soon.

Vanilla Cupcakes

I doubled this recipe and baked it in a 9 x 13 cake pan at the same temperature for about 25 minutes.

½ cup unsalted butter, at room temperature
2/3 cup sugar
3 eggs
1 tsp. vanilla extract
zest of 1 lemon (optional) I omitted this
1 ½ cups all-purpose flour
1 ½ tsp. baking powder
¼ tsp. salt
¼ cup milk

Directions:
Preheat the oven to 350°. Line a muffin tin with 12 paper liners. Set pan aside.

In the bowl of an electric mixer, cream the butter and sugar until light and fluffy. Add the eggs one at a time, scraping down the sides and beating well after each addition. Beat in the vanilla extract and lemon zest, if using.

In a separate bowl, whisk together the flour, baking powder and salt. With the mixer on low speed, alternately add the flour mixture and milk, in three additions, beginning and ending with the flour mixture. Scrape down the sides of the bowl.

Evenly fill the muffin cups with the batter and bake for about 18-20 minutes or until a toothpick inserted in the center comes out clean. Remove from the oven and allow to cool in pan 5 minutes. Transfer cupcakes to a wire rack and allow to cool completely.

Tuesday, November 11, 2008

Tuesdays With Dorie: Kugelhopf


This week's Tuesdays with Dorie recipe was a bit of a challenge for me. First of all, the recipe, which was picked by Yolanda of The All-purpose Girl, is for a yeast cake called Kugelhopf. This recipe scared me because of the fact that I have never made anything by myself with yeast. Nothing, ever. So I was very nervous that I would somehow mess this up and end up looking silly on my second week in the group. But amazingly everything with the dough went just fine. My dough rose like it was supposed to each time, much to my amazement. So when the last rise in the fridge was done I had a perfectly risen dough.

Then came the real trouble. This cake can be made in a special Kugelhopf pan or in a regular bundt pan, I planned to use a bundt pan. I have never made anything in a bundt pan, so I planned to use the one from a Kitchen Aid set I had gotten a while ago at Linens 'n Things for the first time. Well, lets just say I learned an important lesson: always check your pans before you start baking. It turns out I had a mini bundt pan, not the full size one I thought I had. Luckily I had read on the Tuesdays with Dorie site that you could make these in a muffin pan, so that's what I did. So we had Kugelhopf rolls, instead of a cake.

This recipe was actually a lot simpler than I thought it would be. It has a nice texture and a good taste to it. I think if I make it again I will use something other than raisins in it, I'm not a big fan of raisins in my baked goods. Overall though this was an easy recipe and, I think, a nice introduction to yeast.

Kugelhopf from Baking From My Home to Yours by Dorie Greenspan. Pages 61 to 63.

Tuesday, November 4, 2008

Caving to Peer Pressure

I never really had to deal with peer pressure in high school. I think I was just so far into the world of band geeks and drama freaks that I just never noticed it. Sadly, the same is not true for me as an adult apparently. First I let myself get "talked into" (also known as commanded) reading young adult book about a girl who falls in love with a vampire. And now I have let myself be talked into joining a blog group where everyone bakes a recipe a week from Dorie Greenspan's Baking From My Home To Yours and blogs about it on Tuesdays. The vampire book thing ended up being great (thanks for the pressure on that one!) and I think this baking thing may be ok too (thanks Jessica and Maci!).


So for those of you who don't know about this blogging group let me explain. The group is called Tuesdays with Dorie and is composed of a huge variety of food bloggers from all over who have Dorie's book. Each week a member selects one recipe and everyone bakes it and then blogs about it. They ask that you do not post the recipe to your blog to encourage more people to go buy the book and support the publishing world (and as a major book fanatic (both cookbook and other) you know I love that! I had been toying with the idea of joining this group for a while now, but was always really intimidated by the awesome things everyone was making. However, recently the group set a cut off date to join, you had to sign up by 10/31 if you wanted to be a member. So the peer pressure had been strong the last few weeks (ahem, Jessica) and I finally caved in, er I mean decided to join.


So, this is my first Tuesdays with Dorie recipe and I was both excited and nervous about it. The recipe was chosen by Piggy of Piggy's Cookin Journal (check it out!) and is for Rugelach. I have had this treat before but had never made it, so I was excited to try it. I was also slightly frightened because this is another recipe that calls for making and rolling out a dough. I survived the rolling process and they turned out pretty good. They didn't really hold their shape very well though, but they are still good. I think I am going to try to make another batch and play around with the shape until I get it to work (and goodness knows I could use the rolling practice).


So check out the other bloggers who are doing Tuesdays with Dorie and check back here on Tuesdays for the newest TWD recipe.


Recipe: Rugelach from pages 150 and 151 in Baking From My Home to Yours by Dorie Greenspan.

Monday, November 3, 2008

A Small Break From Cooking


So my kitchen got a nice gift Saturday night: it got deep cleaned. I will admit that I am not the best cleaner. I tend to clean in waves, sometimes I'm in the mood to really clean and will do everything but other times I barely have the desire to wipe the counter. However, I have realized lately that I am a lot happier when the house, especially the kitchen, is clean. So when Katie at The Hyper Homemaker (also the same Katie as Good Things Catered) started a fall cleaning challenge I got the motivation I needed. So Saturday night at about 10:30, after reading Katie's blog posts, I started cleaning our kitchen.

I cleaned out, wiped out, and organized the fridge, freezer, and cabinets. I wiped the doors of all the drawers and cabinets (even the fake ones), reorganized our tiny counter tops, and organized all of dish washing tools. I had already done the pantry earlier that day when we got back from Sam's so that was good. I also scrubbed the stove top and the microwave until the were practically shiny. I was really please with what all I got accomplished, though there are still a few things I need to do in there. But I still have plenty of time for that. So thanks for the inspiration Katie and check out her blog for her daily fall cleaning posts.

Sunday, November 2, 2008

Impossibly Yummy


I'll admit it: I use Bisquick. I use it for pancakes, cheesy garlic biscuits, and this cheeseburger pie. Go ahead and judge if you must, I don't mind. I like Bisquick. It is a great way to make things quickly, easily, and on a budget. We buy the big box from Sam's and it lasts us quite a while. I first made this recipe when I still lived with my parents and was amazed at how easy it was. This is one of the recipes off the back of the box and, according to the Betty Crocker site, is one of the most requested recipes for the company.
This is a great item to make on a night when you want something quick and easy but still warm and filling. When I made this I actually cooked my hamburger the night before so that I could quickly mix this up and throw it in the oven when I got home. I also doubled the recipe to make two pies so that we could get a couple of lunches out of it, it really reheats very well. So, if you can handle using Bisquick (and I'm sure you can) you should give this a try, it really is great.

Impossibly Easy Cheeseburger Pie
From: Bettycrocker.com (also on the Bisquick box)

1 Pound Lean (at least 80%) Ground Beef
1 Large Onion, chopped (1 cup)
1/2 Teaspoon Salt
1 Cup Shredded Cheddar Cheese (4 oz)
1/2 Cup Original Bisquick® Mix
1 Cup Milk
2 Eggs

Heat oven to 400°F. Spray 9-inch glass pie plate with cooking spray.
In 10-inch skillet, cook beef and onion over medium heat 8 to 10 minutes, stirring occasionally, until beef is brown; drain. Stir in salt. Spread in pie plate. Sprinkle with cheese.
In small bowl, stir remaining ingredients with fork or wire whisk until blended. Pour into pie plate.
Bake about 25 minutes or until knife inserted in center comes out clean.

Like a Bat Out of Hell


I think Meatloaf gets a bad rap. No, not the singer. I mean the food, that brown loaf so commonly made fun of as being a staple of horrible lunchrooms and fifties kitchens. I love meatloaf. I think that stems from the fact that we didn't have it all the time when I was growing up. My mom made meatloaf for special meals only, such as birthdays, anniversaries, good grades, etc. And yes, I do remember requesting meatloaf one or two times for my birthday meal growing up (hey, I never said I was a normal kid).
My mom's meatloaf is incredibly simple: meat, bread crumbs, eggs. Worcester sauce, and ketchup are the basic ingredients (no onions in my parent's household, much to Doug's dismay, but sometimes a little onion powder). So I based my recipe off of this, with just a few tweaks for our taste (no onions this time but I am sure I will have to give in eventually). I really recommend taking this recipe and changing it to please your tastes. Maybe you like onions in your meatloaf, maybe you hate Worcester sauce. Do whatever you want to make this taste good to you. We owe it to meatloaf to give it a chance to shed it's horrible reputation.

Meatloaf
By me (Adapted from my mom, Connie)

2 Pounds Ground Beef
2 Eggs
1 Cup Bread Crumbs
1 Teaspoon Garlic (I have a jar of minced garlic (yes, gasp!) but you could add however many cloves make you happy)
1 Teaspoon Season Salt
3 Shakes of Worcester Sauce
2 Shakes of Soy Sauce
1 Tablespoon Steak Sauce

Preheat oven to 350 degrees.
Spray pan with non stick spray (I use a roasting pan with the tray in it).
Mix all ingredients together. Form into a log or loaf shape and put into pan.
Shake a little more Worcester sauce and steak sauce on top if desired.
Bake at 350 for about 1 hour or until completely cooked.

This can be eaten with ketchup or steak sauce if desired. I think this is even better the next day for lunch.

Monday, October 27, 2008

The Great Exchange


The cooking board I frequent does a recipe exchange every few months, I did one last year around Christmas but hadn't done one since. So when the last one's roundup was posted I decided to do it. And I'm glad I did! The recipe I got is for a great veggie chicken rice casserole. It was really easy to put together and tasted great, especially today when I had some of the leftovers for lunch. This was the perfect thing for a cool, windy night like we had last night. And it is great because it makes a lot, which means a lot of leftovers, which I love. This is a simple recipe that doesn't call for any outrageous ingredients, which is a great thing. Try this one out on a cool fall evening, you won't be disappointed.


Veggie Chicken Rice Casserole
Source: allrecipes.com

2 cans condensed cream of chicken soup
1 whole cooked chicken, cut into pieces (the person who sent this to me likes to buy the rotisserie chickens from Sam's or Walmart; I used a couple chicken breasts that I had previously baked, shredded and frozen)
1 pkg. frozen mixed veggies, thawed and steamed
2 c cooked rice
2/3 c water
1/2 c crushed Ritz crackers

Preheat oven to 350 degrees. In a large bowl, combine the soup, chicken, cooked veggies, cooked rice and water. Mix well and spread mixture in a 9x13" baking dish. Sprinkle crushed cracker crumbs on top and bake in the preheated oven for 15-20 minutes. Let cool 10 minutes, then serve.

Beer + Cheese = Heaven


Sometimes the things that I like to eat surprise me. Like beer bread. I don't really care for beer, don't like the flavor. But I love beer bread. Maybe it is the fact that it's a bread and I love bread so much that I forget what is in it. At any rate, I was very excited when I saw this cheesy beer bread come up on Katie's Good Things Catered blog. I love cheese and bread and Doug loves cheese, bread, and beer so this was sure to be a hit in our house.

I didn't have any whole wheat flour so I just used all AP flour (but I do plan to buy some WW flour soon and will definitely be trying this again). For the beer I used Miller High Life and we ended up really liking the way this tasted. The bread is really easy to put together and stays fresh for a few days in a Tupperware container. We had this Saturday night with steaks and potatoes and carrots and then again last night with chicken casserole. I just finished the last piece a little while ago and it was just as good as the first. I will be making this again for sure and totally recommend that you give it a shot next time you want some beer bread.


Easy Cheesy Beer Bread

Ingredients:
2 c. all purpose flour
1 c. whole wheat flour (I used all AP)
1/3 c. packed brown sugar
4 1/2 tsp baking powder
1 tsp salt1 tsp garlic powder
1 c. shredded sharp cheddar
12 oz. bottle of lager or stout (I used Miller High Life)
2 Tbsp butter, melted

Directions:
Preheat oven to 350 degrees and prepare loaf pan for baking.
In large bowl, combine flours, sugar, baking powder, salt, and garlic powder.
Whisk to combine well.-Add cheese and whisk to combine.
Slowly add beer to dry ingredients and stir lightly until combined.
Knead dough lightly until it just comes together.
Place into prepared loaf pan and pour melted butter over top.
Place in oven to bake for 55-60 minutes, or until toothpick inserted into center of loaf comes out clean.

Saturday, October 25, 2008

Peanut Butter Goodness


I love muffins. They are a great option for a breakfast on the go, which is really important since that is how I eat my breakfast five days a week. Because of this I am always watching for a great new muffin recipe. So when Annie posted these on Annie's Eats I was really excited. I actually rushed home and made these the same day she posted them, it has just taken me a really long time to blog them.

We liked these muffins and thought they were really good. I thought they were really big and filling, which is great. I think the next time I make these (which will be soon) I am going to add just a little more peanut butter, we both love peanut butter and thought these would be good with a little stonger flavor. But I highly recommend these, they are really great.

Peanut Butter Chocolate Chip Muffins

Ingredients:
2 ¼ cups all-purpose flour
2 tsp. baking powder
½ tsp. salt
2/3 cup brown sugar
6 tbsp. butter, melted and cooled
½ cup peanut butter
2 large eggs
1 cup milk
¾ cup chocolate chips

Directions:
Preheat oven to 375°. Line a muffin pan with 12 paper liners.

In a medium bowl, whisk together the flour, baking powder, salt and brown sugar. Set aside.

In a large bowl, whisk together the melted butter, peanut butter, eggs and milk until smooth. Add in the flour mixture and stir until just combined. Stir in chocolate chips. Divide batter evenly between prepared muffin tins, filling each to the top.

Bake for 17-20 minutes or until a toothpick inserted in the center comes out clean. Allow to cool for 5 minutes in the pan, then remove to a wire rack to cool completely.

Sunday, October 19, 2008

I'm a Copycat: Chicken Quesadillas like the ones at Applebees


When my friend Sarah and I go shopping you can almost guarantee that we will eat lunch at Applebees. We do not have one in the towns we both live in, so the only time we can eat there is when we go 45 minutes north to shop. So last weekend we took a road trip with her daughter to buy her Halloween costume and stuff for her totally awesome Disney Princess-themed 4th birthday party. So, of course, we had to go to Applebees since we had not been there is forever. We both have our usual meal choices, so usually menus aren't needed, however this time Sarah asked if I wanted an appetizer because she was starving (chasing a 3 year-old will do that to you). So of course, not wanting the driver to starve to death, I said yes and we began the agonizing process of trying to pick something.

We ended up getting the Chicken Quesadillas, and oh my are they good. They come out on this huge platter with giant dollops of salsa, sour cream, and shredded lettuce in the center of the plate. Surrounding that are these cute, triangular shaped tortillas stuffed with chicken, pico de gallo, cheese, and bacon. They were so good that I was wishing I hadn't ordered anything else so that I could just eat these. So after shopping till we dropped that day I ran home to look for a copycat recipe on the Internet and found this one that is perfect on Recipe Czaar. It tastes almost exactly like what Applebees serves and is really great dipped in salsa and sour cream (I can loose the lettuce, it seemed out of place to me). These are a great, quick meal (especially if you precook the chicken like I did).

Let me stop here to say that these are not exactly healthy. These have a fairly high calorie count on Recipe Czaar and it is really easy to eat a lot of these. However, I think that the occasional splurge is alright, but I definitely will not be making these every night. It is possible to make them a little better though, you could use turkey bacon, whole wheat tortillas, and low fat cheese and sour cream. But as a rare meal, these are an excellent treat.


This recipe makes one quesadilla, so multiply everything by the number you want to make. I made 5 total and had some leftover.


Chicken Quesadillas Recipe (Similar to those at Applebees)
From: Recipe Czaar
1 quesadilla
2 slices lean bacon
(sliced into 1/2" pieces)
2 flour tortillas
(8" diameter)
softened butter
(softened for lightly spreading on tortilla shells)
1 tablespoon pico de gallo

1/4 cup shredded colby-monterery jack cheese

salsa and sour cream for dipping
2 cooked chicken breasts
, cut into strips I shredded mine
Slice bacon and fry until bacon starts to turn crisp but not hard and brittle.
Remove from pan, drain bacon and set aside.
Spread butter lightly on one side of the flour tortilla shell.
Place buttered side of shell down, into a non-stick fry pan that has been preheated on medium heat.
Sprinkle 2 tablespoons of bacon over entire shell, then add 1 tablespoon Pico de gallo, and 1/4 cup shredded Colby/Monterey Jack cheese over the bacon.
Add pieces of the cooked chicken.
Place the second flour shell on top of fixings, buttered side up.
Cook for about one- two minutes just long enough to heat the inside ingredients and then carefully flip the quesadilla on the other side and finish cooking.
The quesadilla should be heated through but not browned.
Remove quesadilla and place on a serving dish and cut into individual triangle serving pieces.
Serve quesadillas with your favorite guacamole sour cream, and picante sauce.

Apples Go Crunchy


Yes, another apple post. I promise though, this will be the last one (at least for a while). This is another recipe from Good Things Catered and another really quick, easy, and tasty item. When I made the apple cobbler Doug and I had a discussion on the difference between crumbles, cobblers, and crisps which lead to Doug requesting something crisp like. So at once I set upon the oh so arduous task of digging through all of the awesome blogs I read (you know how much I hate this task) until I found something that looked good. And let me tell you, this recipe looked good. It also looked quick and easy, two things I love to hear on a work night (I always still want to call them school nights, lol).

So I set about the kitchen whipping this up. I love that this recipe doesn't call for any random ingredients, it merely uses the basics that I always keep in the house. I also love it because it uses oats and I love pretty much anything with oats. I definitely recommend this treat for any night when your sweet tooth is hollering for something starring apple, you won't be disappointed.


Apple Crunch

Ingredients:
4 large apples
1/2 c. oats
1/2 c. packed brown sugar
1/4 c. whole wheat flour
4 Tbsp butter, cold
1 tsp cinnamon
1/4 tsp nutmeg
1/4 tsp vanilla

Directions:

Preheat oven to 375 degrees and spray an 8x8 baking dish with baking spray

Peel, core, and dice apples into 1/2-inch pieces-Spread apples evenly in baking dish.

In medium bowl, combine oats, brown sugar, flour, cinnamon and nutmeg

Cut butter into small pieces and add to dry ingredients along with the vanilla.

With pastry blender, cut butter into dry ingredients until all butter is about the size of a small pea.

Sprinkle this mixture evenly over apples.

Place baking dish in oven and bake for 55-60 minutes or until apples have cooked down and begun to caramelize.
Remove from oven and let cool for 10 minutes before serving.

The Next Spice Girl: Apple Spice


Continuing in this string of apple recipes (I told you we had a lot of apples, today I present apple spice cookie bars. These are incredibly good. As in, I could eat way too many of these at a time good. I found the recipe on Katie's Good Things Catered blog, which is where I've found a lot of the recipes currently living in my to-make pile. I've actually made these twice now and we've loved them both times. The fact that I've made them more than once should mean that I should have a better picture than this one, but I never have the mind to take a great picture when they are first done but I'm usually too busy thinking "smells good, looks good, want to eat." I hope to make them again so maybe the third time is a charm for picture taking.

These are incredible good and really simple to make. I've whipped them up in the evening after I've gotten home from work both times. They are also a great way to make your house smell good. Who needs candles when you can make apple spice cookie bars?


Apple Spice Cookie Bars

Ingredients:
2 c. plus 2 Tbsp all purpose flour
2 tsp baking powder
1/4 tsp salt
2 tsp ground cinnamon
1/8 tsp nutmeg
1/8 tsp allspice
small pinch ground cloves
1/2 c. butter, melted
1 c. packed brown sugar
1 c. white sugar
2 eggs
1 Tbsp vanilla extract
2 apples, cored and diced (a little less than 2 c.)
cinnamon sugar for sprinkling

Directions:

Preheat oven to 350 degrees and line 9x13 pan with foil and baking spray.

In medium bowl, combine flour, baking powder, salt, cinnamon, nutmeg, allspice, and cloves. Whisk to combine well and set aside.-In bowl of stand mixer, combine sugars and butter and beat on medium high until light and fluffy, about 1 minute.

Add eggs, one at a time, beating well to combine.

Add vanilla extract and beat to combine.

Turn mixer on slow and fold in flour mixture a little at a time until just combined.

Fold in apples.-Spread mixture evenly into prepared pan and sprinkle top generously with cinnamon sugar.

Place in oven and bake until cooked through, when top slightly bounces back to the touch, about 30 minutes.

Remove from oven and let cool completely before removing from pan, cutting and serving. (bars will be very soft)


Saturday, October 18, 2008

Apple Pie Goes Mini


So in the quest to finish off all of the million and one apples that have taken up residence in our kitchen, I have decided to spread my wings and test my boundaries. Thus, when Annie and Chelley posted recipes in their blogs for mini hand pies I was intrigued, especially by Chelley's apple pies. I was also slightly frightened, as I have never made a pie dough in my life. I'm not sure why that is, but I've never had the desire to try to best Pillsbury. But I recently decided to try to test myself in the kitchen and this seemed like a great way to do it. So last night while Doug was at work I set about the task of preparing the dough (with Chelley having told me it would be ok over night). I was actually really surprised at how easy this was. It takes a while, but most of that is just chill time for the dough and I never once felt frazzled. I was so excited when it was all ready and it "looked like a dough!" as I told anyone who would listen.

Today I attempted rolling out the dough, which is something I do not have a lot of experience with. And let me tell you, I definitely need some practice! I had a heck of a time rolling my dough out to the same thickness each time, but I finally got it to work. I broke open my 101 cookie cutter box for the first time to use the circular cutter to make the pies, which worked perfectly. I actually had fun filling these with the apple sugar mixture and sealing them up. I felt like Alton Brown making the decorative edges, using the egg wash and adding sanding sugar to the top.

These are absolutely awesome and I totally recommend making these. They take a while but they are totally worth it.

Chelley did a great job of describing the process of making these, so check out her blog.


Apple Hand Pies

I got it from Brown Eyed Baker

She adapted from Smitten Kitchen


For the pastry:

2½ cups all-purpose flour

½ teaspoon salt

16 tablespoons (2 sticks) unsalted butter, cut into pieces

½ cup sour cream4 teaspoons fresh lemon juice

½ cup ice water
For the Filling:

2 apples, peeled, cored and diced small

1/3 cup sugar
One egg yolk beaten with 2 tablespoons water (for egg wash)

Coarse sanding sugar, for decoration


1. To make the pastry, in a bowl, combine the flour and salt. Place the butter in another bowl. Place both bowls in the freezer for 1 hour. Remove the bowls from the freezer and make a well in the center of the flour. Add the butter to the well and, using a pastry blender, cut it in until the mixture resembles coarse meal. Make another well in the center. In a small bowl, whisk together the sour cream, lemon juice and water and add half of this mixture to the well. With your fingertips, mix in the liquid until large lumps form. Remove the large lumps and repeat with the remaining liquid and flour-butter mixture. Pat the lumps into a ball; do not overwork the dough. Cover with plastic wrap and refrigerate for 1 hour. If preparing ahead of time, the dough can be stored at this point for up to one month in the freezer.
2. Divide the refrigerated dough in half. On a lightly floured work surface, roll out one half of the dough to 1/8-inch thickness. Using a 4 1/2-inch-round biscuit cutter, cut seven circles out of the rolled dough. Transfer the circles to a parchment-lined baking sheet, and place in the refrigerator to chill for about 30 minutes. Repeat the rolling, cutting, and chilling process with the remaining half of dough. (I used a 4-inch cutter-if you can call a “cutter” the tin edge of the container that holds my smaller round cutters-and managed to get 12 from each dough half, after rerolling the scraps.)
3. Mix the diced apple with the sugar, and cook over low heat for 8-10 minutes, until the apples are tender. Set aside. Prior to preparing the pies, drain any accumulated liquid from the apples.
4. Remove the chilled dough from the refrigerator, and let stand at room temperature until just pliable, 2 to 3 minutes. Spoon about 1 to 2 tablespoons filling (use the smaller amount for a 4-inch circle) onto one half of each circle of dough. Quickly brush a little cold water around the circumference of the dough, and fold it in half so the other side comes down over the filling, creating a semicircle. Seal the hand pie, and make a decorative edge by pressing the edges of the dough together with the back of a fork. Repeat process with remaining dough. Place the hand pies back on the parchment-lined baking sheet, and return to the refrigerator to chill for another 30 minutes.
5. Heat oven to 375 degrees. Remove the chilled hand pies from the refrigerator, cut a small slit in each and lightly brush with the egg yolk wash. Sprinkle sanding sugar generously over the pies, and place pies in the oven to bake. Bake until the hand pies are golden brown and just slightly cracked, anywhere from 20 to 40 minutes, depending on how thick you rolled the dough. Remove the pies from the oven, and let stand to cool slightly before serving.

Saturday, October 4, 2008

My Very First From Scratch Apple Cobbler


That lovely creation up there is my very first from scratch apple cobbler. Now, I have made a few cobbler before that were very good, but they were all with the help of a mix. We live near an Amish community and have vacationed near some, so my mom and I have found many great Amish cobbler mixes over the years. However, I have been on a mission to make as many things from scratch as I can, I figure if I have the ability then why not? (Plus it has been a while since I've made it to an of the Amish stores.) So today I went hunting for a great looking apple cobbler recipe to use up some of the great apples my parents brought us from the local orchard. I also had a jar of this incredible apple cinnamon spread from a local baker that I wanted to use, and at my last job a girl who is related to the local baker brought in a cobbler made with this spread, so I knew I wanted to try that.


I looked at all the usual sites to try to find a recipe, but nothing jumped out at me. Then I remembered that back when we were in the middle of the peach frenzy I had printed out a peach cobbler recipe. So I found that recipe and started to tweak it to satisfy my apple needs. I've never really messed with a baking recipe before. No matter how often I play around in the kitchen while cooking I've always been afraid to do so while baking. In my mind there is just too big of a chance of me messing everything up, and that would make me very sad. But today I decided to be brave and make an attempt. I basically took the peach cobbler recipe and took all of the seasonings out of the recipe and replaced them with the apple cinnamon spread. Then I added some cinnamon to the topping batter before I put it on the apples. I also left off the cinnamon sugar topping that the original recipe called for. I thought it might be a bit too much, and I was going for a strong cinnamon flavor so I just added it to the topping. I was really nervous to try this but it came out great! The apples have a great cinnamon taste, not too sweet with a nice spice to them. I think I will make more of the topping next time, it did not completely cover the entire apple mixture, so I have a few gaps. But despite that fact I'm really please with my first attempt at making changes to a recipe, and I don't think I will be as worried next time.

I'm entering this into Joelen's Cobblers & Such blog event over at Joelen's Culinary Adventures. This will actually be my second time doing one of her events. Check out her blog to see all the great events she does.

Apple Cinnamon Cobbler Adapted from Kelly Cooks and Other Amazing Feats

6-8 medium sized apples of your choice - peeled, cored and sliced into thin wedges

1/4 cup white sugar

1/4 cup brown sugar

2 teaspoons cornstarch

3 tablespoons apple cinnamon spread


1 cup all-purpose flour

1/4 cup white sugar

1/4 cup brown sugar

1 teaspoon baking powder

1/2 teaspoon salt
1 tsp cinnamon

6 tablespoons unsalted butter, chilled and cut into small pieces

1/4 cup boiling water


Directions
- Preheat oven to 425 degrees F.- In a large bowl, combine apples, cup white sugar, cup brown sugar, spread, and cornstarch.
- Toss to coat evenly, and pour into a 9 x 13 pan
- Bake in preheated oven for 10 minutes.- Meanwhile, in a large bowl, combine flour, 1/4 cup white sugar, 1/4 cup brown sugar, baking powder, cinnamon, and salt.
- Blend in butter with your fingertips, or a pastry blender, until mixture resembles coarse meal. - Stir in water until just combined.- Remove apples from oven, and drop spoonfuls of topping over them.
- Bake until topping is golden, about 30 minutes. (Mine was only about 20 minutes)


Saturday, September 27, 2008

Rated E for Excellent: aka: Someone actually reads this!


I was really excited and surprised to get a comment from my fellow Illini fan Erin over at Milk & Honey telling me that she had nominated my blog for the E for Excellent Award! This is my first blog award and I am totally excited. Sometimes I start to wonder if anyone actually reads this blog (with the exception of those who I force at steak knife point... don't worry, I'm kidding). So now on to some of my favorite blogs:


First is Elly at Elly Says Opa! Elly's blog always makes me really, really hungry.

Next is Amber at Amber's Delectable Delights. This is another one that I know will always make me hungry.

Then there is Julie's blog Jewels in the Kitchen. I love, love this blog and Julie, she is one of the sweetest girls over on the cooking board I visit.

Then there is Annie at Annie's Eats. Annie's blog is where I turn when I need something to wow someone.

Next is Maci over at My Yummy Goodness. Maci is a Southern sweetheart and a fellow DMB fan, so you've gotta love her :)

Finally, I will give you Katie at Good Things Catered. This blog is responsible for my to-be-made pile doubling within the last couple of weeks, everything she makes just looks so good!


Now it is your turn:
Please find at least 10 more blogs, of any kind that you love to read. Write a post about the blogs you picked, linking back to me and to them. Once you’ve posted, return here to let me know your post done and be sure to let them know too!!! (If you don’t come up with 10, that’s fine too!)


Cornbread Heaven in Salad Form: An Eat to the Beat Entry


Doug and I both share a love music, we actually met in band in high school (yeah that's right, we were band geeks). Over the years we've both played a number of different instruments (some well and some not so well; he always better than I). We love to share new songs that we've heard with each other, he loves to expose me to great old bands he enjoys, and I occasionally will force some so-so pop artist upon him. But there is one band that has a very special place in both of our minds: The Dave Matthews Band. The first time I ever rode in a car with Doug he had DMB playing and the song Crash Into Me came on. I had always loved that song and the music video (way back in the day when MTV still played videos) and we started talking about the band (he knew way more about them than I did) and how awesome they were (and shortly after the song ended we shared our first kiss). Needless to say, that became our song. The next year we went and saw DMB perform, our first concert as a couple and had a total blast. Last year when we got married we hunted for the longest time for the perfect song (our reception was at our church, so Crash Into Me was not appropriate: that whole "lift up your skirt and show your world to me" part kind of nixed it); going through lists online and through every cd we both owned before we finally went "hey what about" and then proclaimed Steady as We Go to be the winner. This past summer we went to another DMB concert (our first as a married couple) and had an incredible time. DMB concerts are a blast: they last for a very long time but you never notice it because you are having so much fun.

After the concert I went into a major DMB phase, listening to every one of their cds we owned. During this I realized that one song that I really liked wasn't played at our concert (but I later found out it was played at the first night's show). That song? Cornbread. I won't totally go into details about what this song is about (this is a family blog after all) but let's just say the Dave isn't inviting you over for a nice Sunday lunch featuring fresh baked cornbread! You can check out the lyrics here, if you want to form your own opinion on what the song is about. But it is an incredibly fun song that gets stuck in your head for days and I love it.

Now, I told you all that to lead up to this dish. Last summer Doug's cousin got married in Mobile, Alabama. It was a great wedding with an awesome reception that featured a bunch of tasty salads (among other things). And one of those salads was a Cornbread Salad that we all loved. Doug's aunt thought this was extremely funny because she said every Northerner loves that salad. Then she promptly stated that the caterer refused to give out the recipe. No problem. A few months later I received a cute community cookbook from Doug's grandmother as a gift at my bridal shower and what recipe was in the salad section? That's right, Cornbread Salad. And what's the main ingredient in Cornbread Salad? Cornbread, of course!

So, using DMB's Cornbread as my inspiration and backing track, I offer up this tasty side dish. It is relatively easy to make and very tasty to eat. And I declare it "A little bit of heaven, and a little bit of aw yeah." Try it out yourself, and check out DMB performing the song here.

I'm entering this into Eat To The Beat over at Elly Says Opa. This is a blog event that Elly created where you enter a food item that is in some way connected to a song or band, whether it is named after them or just somehow inspired. So go check out Elly's blog (and prepare to be hungry!)


Cornbread Salad
By Teresa Stanley
From Treasured Recipes By the Monticello United Methodist Church
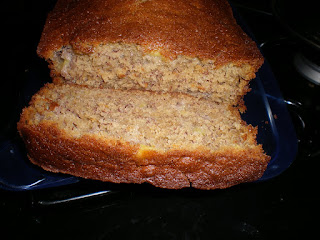
1 (8.5 oz) package cornbread mix You could make from scratch if you wanted
1 Envelope ranch-style dressing mix I used Hidden Valley Ranch dressing mix
1 Cup sour cream
1 Cup mayonnaise (or Miracle Whip)
1/2 Cup green pepper, chopped
1/2 Cup sweet red pepper, chopped I didn't add this item this time
1/2 Cup onion, chopped
1 (16 oz) Can pinto beans, drained
2 Cups fresh or frozen corn
2 Cups cheddar cheese, shredded I left this out
10 Slices cooked bacon, crumbled (optional) I added this
Bake cornbread mix according to package directions and crumble. Combine ranch-style dressing mix, sour cream and mayonnaise in a small bowl. In another bowl, mix together peppers, onions, tomatoes, pinto beans, and corn. In a 3-quart salad bowl, layer half of the cornbread, half of the vegetables, half of the cheese, half of the bacon, and half of the dressing. Repeat layers with remaining ingredients. Cover and store in the refrigerator until ready to serve. Note: Use low or no-fat sour cream and mayonnaise to reduce the calories in this dish. The longer this dish sits, the better it tastes.
I just mixed all the ingredients together (cornbread, vegetables, and bacon) and then mixed the dressing into it, that is how we had it before. I made this the day before we ate it and it was really good.

Wednesday, September 24, 2008

A Quick, Budget Friendly Meal


So it has been a while since I last posted. I've been fighting off a cold which has made cooking and being on the computer seem unappealing. But I am finally feeling better and am now pretty backed up on blog updates. So keep an eye out for some tasty items coming up, including my entry to Eat to the Beat and another birthday cake.

But first here is this tasty treat that Doug and I had for dinner not too long ago: nachos! I love nachos but had never made them at home before. They are so great: really easy, affordable, and you can add whatever you want to them. We kept these pretty simple but next time I may get more to put on them. One great thing about these is a last minute move by Doug. When it came time to add the water and taco seasoning to the ground beef (yes we use taco seasoning, we have a big container of it actually) instead of adding water he added beer! At first I was a little skeptical, but it added this awesome depth of flavor to the meat. It was just Budweiser that he added, though I think any beer would work as long as it wasn't one of the ones that has a different flavor to it (I'm pretty Blue Moon wouldn't work, it would taste weird). I'm not really a beer fan even, but I thought it was a great flavor.

This entry also sees the addition of a new tag for this blog. With money being so tight for many people there have been a lot of posts over on WC for budget friendly meals. So with that in mind I am creating a Budget Friendly tag, and I plan to go back eventually and add it to past items. That way I can easily point out these recipes to friends and they will be easy to find on here.

There isn't really a recipe for these nachos, just add whatever you would like to a pile of chips and you are good. You could do chicken or refried beans instead of the beef and your choice of vegetables, cheese, and toppings to make these truly yours.


What we used:
Nacho chips
Mexican Shredded Cheese
Ground beef seasoned with taco seasoning and beer
Salsa
Sour Cream
I realize that isn't the best picture, but nachos are hard to make look good for the camera :)

Saturday, September 6, 2008

A Timeless Classic: Oatmeal Scotchies


These are one of my favorite cookies that I really associate with fall. I'm not totally sure why that is, except for the fact that the tastes (oatmeal, cinnamon, butterscotch) all just scream fall to me. Plus I (and my mom) only really ever make them in the fall and winter. So when my yearning for fall got to be to much last week (when it was still in the 80s here) I decided to bust out the one bag of butterscotch chips I was holding in my pantry and whip up a batch of these bad boys. I always just follow the recipe on the back of the bag and they are so good. The remind me of growing up, of fall, and of the holidays (and if you get a Christmas present from me this year do not be surprised to find these cookies!). So here is the recipe for these incredible cookies, whip up a batch and bite into a great taste of fall.

Oatmeal Scotchies
Source: Nestle (find the recipe here)

Ingredients:
1 1/4 cups all-purpose flour
1 teaspoon baking soda
1/2 teaspoon salt
1/2 teaspoon ground cinnamon
1 cup (2 sticks) butter or margarine, softened
3/4 cup granulated sugar
3/4 cup packed brown sugar
2 large eggs
1 teaspoon vanilla extract
3 cups quick or old-fashioned oats
1 2/3 cups (11-oz. pkg.) NESTLÉ® TOLL HOUSE® Butterscotch Morsels

Directions:
Preheat oven to 375° F. Combine flour, baking soda, salt and cinnamon in small bowl. Beat butter, granulated sugar, brown sugar, eggs and vanilla extract in large mixer bowl. Gradually beat in flour mixture. Stir in oats and morsels. Drop by rounded tablespoon onto ungreased baking sheets. Bake for 7 to 8 minutes for chewy cookies or 9 to 10 minutes for crisp cookies. Cool on baking sheets for 2 minutes; remove to wire racks to cool completely.