Sunday, November 28, 2010

Honey Yeast Rolls

IMG_0496

So I can’t believe I haven’t blogged these before. I made them last year a couple of times and really thought that I had blogged them. But when I went to make my grocery list for Thanksgiving I tried to pull up the recipe to see if I needed anything and discovered that it wasn’t there.

So I went back to the original source of these insanely easy and delicious rolls, Annie’s Eats, to make my list but vowed that they would be blogged this time. They are just way too good not to be posted all over the Internet. And as proof of this fact I admit that I did not get a single picture of a roll out of the pan – they didn’t last that long! There were a few left when we were finished with our meal but they were quickly grabbed and thrown into bags because everyone wanted one for later! Plus, my mom loved these so much that she raved about “the delicious rolls Kayla made” to both of my aunts when they talked on the phone. Now that’s a sign of a good roll!

But my favorite thing about these rolls is how easy they are. They were one of the first (and still only really) yeast recipes that I’ve tried. Even last week when I made them I still got nervous when I mixed them up – but it was totally stupid because they rose so well right away. I’m pretty sure there is no way to mess these up.

And another great thing about these is that you can stop them mid-process and freeze them and they are just as delicious as when you go from start to finish.

Definitely go check out Annie’s blog for more gorgeous pictures of these rolls (and all her other amazing looking food!). And then try them, you’ll be glad you did.

IMG_0497

Honey Yeast Rolls From Annie’s Eats

Ingredients:
2¼ Teaspoon Instant Yeast
1 Cup Water (105-115 degrees F)
¼ Cup Honey
3 Tablespoons Oil (Canola or Vegetable)
1¼ Teaspoon Salt
1 Egg, beaten lightly
4 Cups bread Flour
Vegetable No-stick Spray
2 Tablespoons Melted Butter 2 Tablespoons Honey

In a mixer combine yeast and water. Then add honey, oil, egg, and salt. Mix well.

Add 3 cups of the bread flour and mix until it comes together – it will be very sticky. Switch from the paddle to the dough hook for your mixer. On low speed slowly add the last cup of bread flour. Mix until it is completely mixed in. Continue mixing for around 8 minutes or until the dough is a smooth ball that is elastic in consistency if pulled.

Spray a large bowl with the no-stick spray. Place the ball of dough into the bowl, turn it around until covered with the spray, and cover the bowl with plastic wrap. Place the bowl in a warm spot and allow to rise for 2 hours or until it is double its original size.

Place the dough on a floured surface and knead for 30 seconds. Cover with a towel for 10 minutes and then punch the dough down. Shape into balls and place into a lightly greased pan (I use a 9x13). I get about 15 rolls, but I think it depends on the size you want them.*

Cover and let rise again for 20 to 30 minutes.

Preheat the over to 400 degrees. Mix together the melted butter and 2 tablespoons of honey. Cover the rolls with the honey and butter mixture. Bake for 20-30 minutes until golden brown.

*This is where I’ve stopped the process to either freeze these or even just keep them overnight. To freeze them cover tightly with plastic wrap and place in freezer – the day before you are ready to make them place the pan in the fridge. To stop them overnight cover tightly and place in fridge. On the day you want to make these (whether you froze them or just placed in the fridge) take them out about an hour and a half before you want to bake them to allow them to come to temperature and have their final rise. Then bake per the directions.

Friday, November 19, 2010

Deviled Eggs

P4030308

With Thanksgiving coming up next week it seemed like the perfect time to finally blog these eggs. Deviled eggs were always a staple on the holiday table in my house growing up, but lately I’ve taken over the making of the eggs. But these eggs are different from the ones I ate growing up. If you’ve seen my egg salad recipe then this recipe will be very familiar. When I make the deviled eggs I use my mother-in-law’s recipe. These eggs are more of a sweet taste while my mom’s are a tangy, mustardy flavor. My hope is to get my mom to write down her recipe for me again so I can blog it too. It shouldn’t be a problem because we pretty much rotate deviled eggs at my parent’s house – one time I’ll make these and the next mom will make the tangy eggs. So hopefully around Christmas I can get the other recipe too.

Just like the egg salad this is really just a list of ingredients – there really isn’t any measurements here. These eggs are totally dependent on how many eggs you are making and your tastes. The Miracle Whip and mayo really just add to the consistency of your filling – adding more will make your filling more creamy but doesn’t really do much for the taste. Adding more sugar, French dressing, or pepper changes the taste. The important thing to remember is that you can always add more of an ingredient but you can’t take it away if you put in too much – so start small and add on.

P4030309

Deviled Eggs From My mother-in-law

Ingredients
Eggs
Mayo
Miracle Whip
French Dressing
Pepper Sugar

Place your desired number of eggs into a pot, cover with water and place over medium-high heat for 20 minutes.*

Once eggs are done drain the water, cover with cold water, and peel the shells off. Place the eggs in the fridge for 15-20 minutes, or until cooled.

Cut your eggs in half and scoop out the yolk, place it in a bowl. To the bowl add mayo and Miracle Whip until you have reached the consistency that you like (I start with a tablespoon of each and then go from there).

Once you are happy with the consistency add the dressing (I usually start with a teaspoon), the sugar (I start with 1/2 a teaspoon), and pepper (I start with a small dash and go from there). Slowly add more of each until you are happy with the result – keeping the amounts you are adding small so you don’t add too much.

Fill your egg whites with the filling – you can spoon it in or pipe it in from a plastic bag with the tip cut off (or you could use a bag and tip like you would for frosting).

Chill for at least 30 minutes (over night is best) then serve.

*If you have another way that you like to boil your eggs then use it. The goal is just to have some hardboiled eggs.

Sunday, June 13, 2010

Ranch Oyster Crackers

These are a really quick and easy snack that comes together in no time flat. They are really tasty and keep really well in an airtight container. They'd be great for a get together or just a night in with a movie.

Ranch Oyster Crackers
Adapted from Delish

1 Bag Oyster Crackers*
1/3 Cup Oil (I used vegetable)
3 Tablespoons Ranch mix (or one packet)
1/2 Teaspoon Garlic Powder
1/2 Teaspoon Lemon Pepper

Preheat oven to 250 degrees. Lightly spray a baking sheet with nonstick spray.
Put oysters in a plastic zip bag.
Pour oil into bag and shake to totally cover the crackers.
Add ranch mix, garlic powder, and lemon pepper to the bag. Shake until well-coated.
Bake for 15-20 minutes, stir after 10 minutes.
Allow to cool before eating.
Store in an airtight container.
*You can also use pretzels.

Sunday, May 23, 2010

Lunch Lady Bars


Show of hands: how many of you are now singing the Adam Sandler song? I know I am (I love me some Adam Sandler).

Anyway, these bars are so incredibly good. They are easy to whip up and require basic ingredients that I pretty much always have on hand. Whenever one of us has a sudden sweet or chocolate craving I can turn to these and be assured that they'll be ready to eat before we cave and give in to the awfulness that is a store-bought cookie.

These would also be a great treat to take to a party - especially a cookout on Memorial Day or the Fourth of July. They're a classic that everyone is pretty much guaranteed to love.


Lunch Lady Bars
From Yum

2 1/2 Cups Flour
1 Teaspoon Baking Soda
3/4 Teaspoon Salt
1 Cup Oil (I use vegetable)
1 Cup Brown Sugar
1/2 Cup Sugar
2 Eggs
1 Teaspoon Vanilla
1 Cup Mini Semi-Sweet Chocolate Chips

Combine all dry ingredients and set aside.
Mix together oil and sugars and add eggs one at a time.
Add vanilla and then gradually add dry ingredients.
Mix in 3/4 cup of chocolate chips.
Spread the mixture into a 9x13 that has been lightly sprayed with non-stick spray.
Sprinkle the rest of the chips on top and lightly push them in.
Bake at 350 degrees for 15-25 minutes or until light golden brown.
Allow to cool and cut into small squares.


Sunday, March 21, 2010

Macaroni and Cheese


I love macaroni and cheese, although most of my life the only mac and cheese I knew came from that blue box. I actually used to not like the homemade version that I would encounter because it wasn't what I was used to. But that all changed a few years ago when I made my first attempt and this recipe has just strengthened that love. In fact, the last time I had the blue box variety I could barely eat it and just kept thinking about how fake it tasted.

This recipe is from The Pioneer Woman, it's on her Web site and in her cookbook. It is really pretty simple, in fact while I was making it I was thinking about how it really is not that much more work than the boxed variety. I definitely recommend this recipe, it's really easy and tasty and is total comfort food. One thing though is I do recommend grating your cheese yourself. Yes, it's kind of a pain but I've made this both ways and it is so much better with self-grated cheese. It's more moist and flavorful than pre-shredded and totally worth the work.


Macaroni and Cheese

4 Cups Macaroni
1/2 Stick Butter (1/4 cup)
1/4 Cup All-Purpose Flour
2 1/2 Cups Milk (I used our standard 2%)
2 Teaspoons Dry Mustard, heaping
1 Egg, beaten
1 Pound Cheese, Grated
1 Teaspoon Salt*
1 Teaspoon Season Salt*
1 Teaspoon Pepper*

Cook macaroni until still firm; drain.
Beat egg. At this point I recommend having every remaining ingredient all measured out; it will make the next few steps much easier.
Melt butter in a big pot and then sprinkle in the flour and whisk constantly for 5 minutes over medium-low heat.
Add milk and mustard and whisk until smooth and then cook for another 5 minutes, still whisking constantly.
Prepare your egg by slowly adding 1/4 of the sauce to the beaten egg, stirring constantly until smooth. This keeps you from having scrambled eggs in your mac and cheese.
Add the egg to the rest of the sauce and stir constantly until smooth.
Add all but 1/4 to 1/2 cup of the cheese and stir until melted (if you want to serve immediately then add all the cheese now). Add seasonings.
Add in drained macaroni and stir until totally covered. You can serve now or...
Pour into a buttered dish (I've used a 2 quart casserole and a 9x13, both work). Top with remaining cheese.
Bake at 350 for 20-25 minutes.

Check out Pioneer Woman's site for additional suggested seasonings.

* PW calls for 1/2 teaspoon of these seasonings, but we think it's better with 1 teaspoon of each.


Tuesday, January 19, 2010

Mastering the Basics: Pizza Crust


So I kind of totally dropped the ball on the Mastering the Basics posts last year, but it's ok because they're back! This time I tackled pizza dough.

We love pizza and eat it a lot around here, but usually I use store bought dough, it's part of that whole fear I used to have about using yeast. But I definitely think I've gotten over that fear! In fact I think I'd like to play around with even more dough recipes in the future, so look out for those!

This recipe is from my friend Hornedfroggy's blog and is from Gourmet Magazine. It was really easy to throw together and turned out great, I will definitely be using this recipe again and I highly recommend you give it a try!

Pizza Crust
From Gourmet Magazine and as seen on My Baking Heart

2 to 2-1/4 Cups All-purpose Flour
1/4 Ounce Package Fast-acting Yeast
1/2 Teaspoon Sugar
2 Teaspoons Olive Oil
1/2 Teaspoon Salt

In a large bowl whisk together 3/4 cup of flour, yeast, sugar, and 2/3 cup hot water (130 degrees F).

Stir in the oil, 1-1/4 cups of the remaining flour, and the salt and blend the mixture until it forms a dough.

Knead the dough on a floured surface, incorporating as much of the remaining 1/4 cup flour as needed, for 5 to 10 minutes, or until it is smooth and elastic.

The dough can be used right away or it can rise once. Put the dough in an oiled bowl and turn it to coat it with the oil.

Let the dough rise, covered with plastic wrap, in a warm place for 30 minutes, or until it is double in bulk, and punch it down.Top with your favorite toppings and bake at 375 degrees for 10-15 minutes.

This is just a basic sausage and cheese pizza. What's your favorite topping?


Monday, January 4, 2010

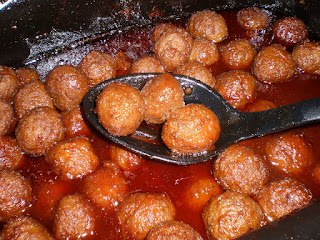
Sweet and Spicy Meatballs


This is a super easy recipe that is great for parties or just a relaxing day at home when you want something different that doesn't require too much work. Doug and I actually ate these on New Year's Day and they were the perfect thing for a lazy day at home.

This is one of those recipes that is really just a list of ingredients - the amounts are really up to you, just add things until it tastes good to you and you have enough to cover your meatballs.

Sweet and Spicy Meatballs

1 Bag of Frozen Meatballs*
BBQ Sauce (your favorite brand)
Grape Jelly
Worchestire Sauce

Place meatballs in crockpot.
Pour a large amount of BBQ sauce into a separate bowl (enough so that it looks like it will cover your meatballs).
Place grape jelly into a separate bowl and microwave for a few seconds until it easily stirs smooth (I usually start with about 1/3 cup, it's easy to add more later).
Add the jelly to the sauce, then add a few dashes of worchestire. Take a small taste and adjust to your liking (more jelly for sweetness, worchestire for spice).
Pour the sauce over the meatballs, make sure they are well covered.
Cook on high for 2.5 to 3 hours or low for 5, or until warmed completely.
Goes great with French bread.

*You can use homemade meatballs also, but they won't need to cook as long.


Friday, January 1, 2010

Best of 2009

Happy New Year!
One of my goals (I hate the work resolution!) is to post on here at least twice a week, so expect many more posts in 2010.

But, in the meantime, here are what I consider my best dishes of 2009.